- If all your data is in a single storage drive, it makes it a bit cumbersome to locate the files. So a unique way to store data in different storage sections so that it stays organized and you don’t have any problem locating all your files
- It also has another unique importance which is; allowing the user to try the different operating system without disturbing your Windows drive. Thereby, allowing one to multi-boot various operating systems on same Windows Computer.
- Total secure of stored data as you may use the other partitioned storage section if you face any problem with the existing one.
- Also, allows you setup a backup for recovery of your user files and documents if lost.
Read Also:- How to turn your Windows 10 PC into a Mobile Hotspot
Disk partitioning in Windows takes little or no effort to conduct as the process is identical to all same Window versions; XP, 7, 8, 8.1 and the current Windows 10. So having known the importance of disk partitioning in Windows, I will guide you on real quick and easy steps to creating a new disk partition on all the Windows versions.
Steps To Create Disk Partition in Windows
Step 1:
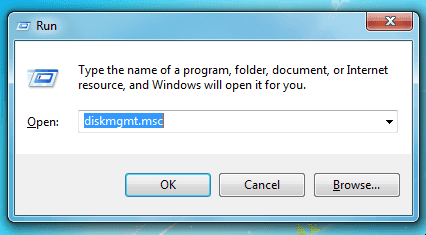
First, open the Run command prompt on Windows by pressing the Windows button + R at the same time. You use this locate and run files (administrative) in you Computer system
Step 2:
Type in the diskmgmt.msc on the Run command prompt tray and click on run. This command opens the Disk Management console window.You can follow the image below for better understanding.
 |
| Image Source: mostusefultricks |
Step 3:
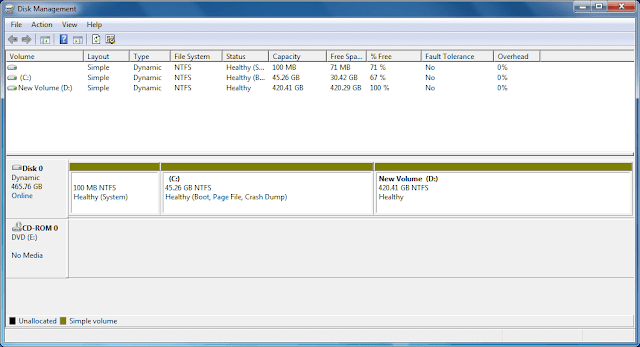
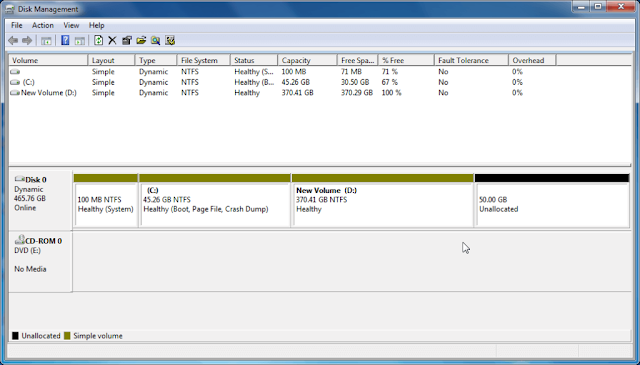
When the Disk Management console Window opens, you will see a tab titled Unallocated, right-click with your right mouse button and select New Simple Volume option to open the New Simple Volume Wizard. If you have all your data is in one single storage drive say Local Disk (C:), then there is a tendency that you’ll have to create the free area or unallocated space first in order to create a disk partition.
Read Also:- Steps to Setting up Backdoor in Windows
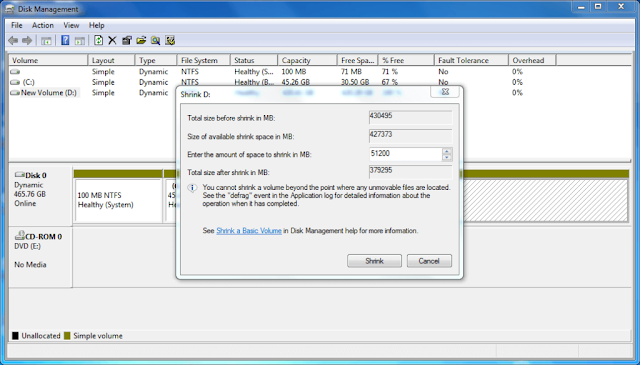
Your hard drive, therefore, needs to be compressed to create free space for partitioning. To do this, right-click on your local drive which may be Disk (C:) or (D:) as the case may be and select the Shrink Volume Option. The remaining space after you might have shrunk your Disk will now be assigned to the unallocated area. Image Below.
 |
| Image Source: mostusefultricks |
Step 4:
Click Next on the Welcome page of the New Simple Volume Wizard that pops up Image Below.
 |
| Image Source: mostusefultricks |
Step 5:
Next now the Specify Volume Size page opens. Here, you can see you’ll see the total space available on your drive for partitioning. You now have to Specify the number of Megabytes you desire in your new disk drive in the Available Simple Volume Size. Keep in mind that you have to Specify the desired space size in Megabytes.
Bonus Point:
- 1024 MB = 1 GB
So, all you have to do now is to calculate the number of Megabytes (MB’s) to be assigned accordingly. After that, continue further by clicking the Next button. image Bellow.
 |
| Image Source: mostusefultricks |
Step 6:
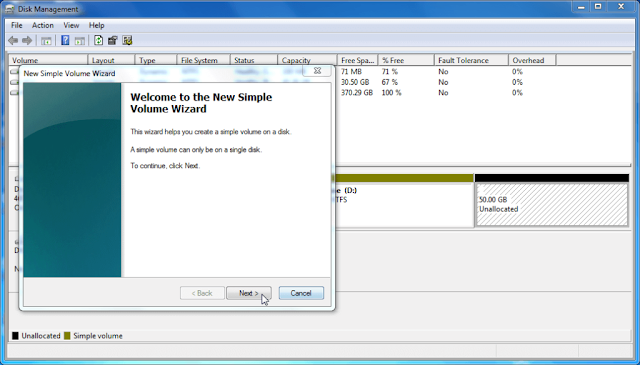
You’ll now see the Path page or Assign Drive Letter page. You can select the letter of your choice with which new storage drive will be associated and as usual click on Next button. *pretty easy after all*
 |
| Image Source: mostusefultricks |
Step 7:
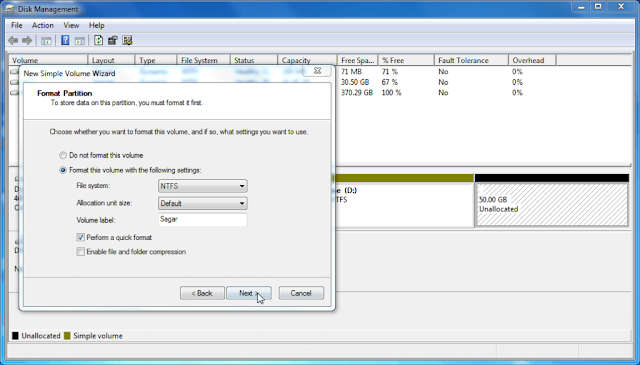
Now comes the Format Partition page option. Here, you required to select the format of new drive. You can make the changes as per your choice or better still leave it as default and then click Next.
 |
| Image Source: mostusefultricks |
Read Also:- Reason You Computer is slowing Down
Step 8:
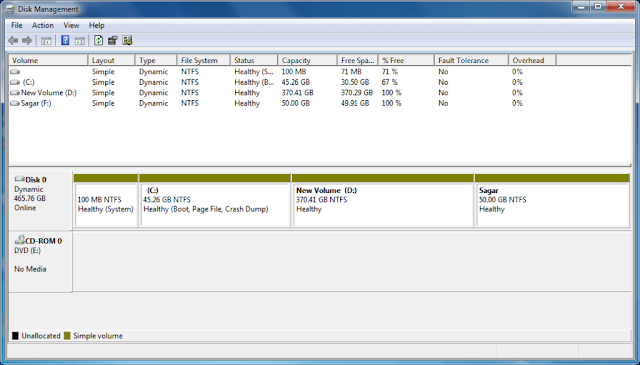
Next requirement now is to select a name for your new partition disk. It can be anything ranging from your own name as new drive’s name, company name, work place if you want. And don’t forget to click *Next*
 |
| Image Source: mostusefultricks |
Conclusion:
With these processes done, the New Simple Volume Wizard page will be completed. You are good to go and your new drive is ready to use; just click on Finish to have a new partition section in your hard drive.If at all you encountered any difficulty following the above steps, do quickly to comment your difficulties on the comment section or better still make use of the contact form. If at all this tutorial was of use to you, tell us also through the comment section. See you next time!
